

How To Repair Travel Trailer Interior Walls
"This site contains affiliate links to products. We may receive a commission for purchases made through these links."
It's quite easy to repair travel trailer interior walls when you know exactly what the problem is, and to what extent the interior damage is.
The major cause of the interior wall damage is water.
A precise cognition of the materials used in making the travel trailers campers will help you to know the degree of the damage and how to fix it.
According to inquiry by Savvy Camper, the average life of a travel trailer is 12 years, but that they tin can achieve 25 years with proper maintenance.
The primary item to keep watch is water damage from the roof or sides. Sealing these every six months will keep your trailer lasting a long fourth dimension.
The duration of your travel trailer depends on how oftentimes y'all maintain it. The minimum lifespan of travel trailers is between nine years to 25 years, co-ordinate to Savvy Camper.
At that place are ii main types of materials used in the production of both interior and exterior walls of travel trailer campers. They include:
- Fiberglass material
- Aluminum material
Let united states report the causes of these interior wall damages based on the materials stated above.
Fiberglass cloth
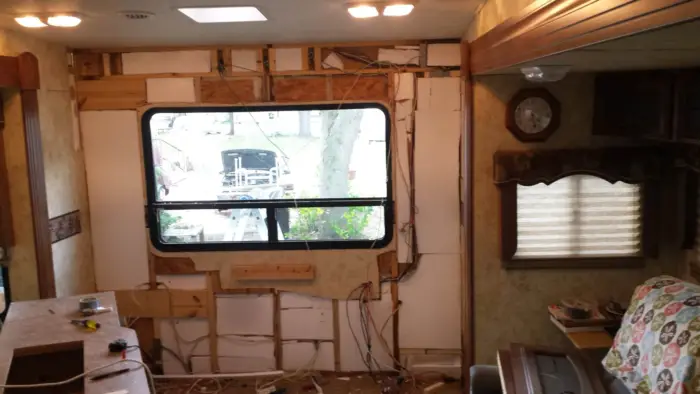
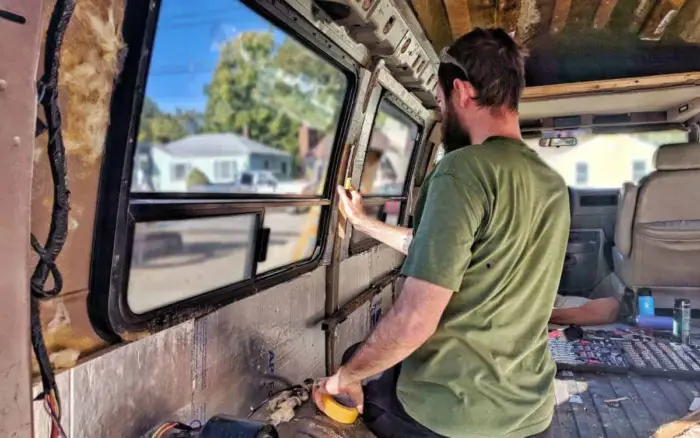
The picture below shows the interior image of a travel trailer made with fiberglass material.
First, permit's beginning with campers made with fiberglass. The interior wall of an RV camper fabricated with fiberglass can easily get damaged as a effect of water and ultraviolet rut.
How does water affect the interior walls of campers made with Fiberglass materials? Read on to know-how.
The interior walls of travel trailers get damaged when h2o enters within of the walls as a upshot of exterior leakage due to the delamination of the fiberglass subsequently being exposed to estrus or by blow.
Most of the time, what causes this delamination is as a result of heat when it's exposed to hot weather for a very long time without being packed under shade.
Besides, when the edges that were laminated kickoff to lose their glues, this causes an opening for easy period of water, which brings about the destruction of the interior walls.
Fiberglass campers are built for h2o to run from the outside, not the inside, but running this h2o, sometimes, can lead to peeling of the panels.
Also, one time the glues that hold the fiberglass together with the Lauan wood lose their cello strength, and so, delamination occurs — from there, water penetrates through the walls, this leads to interior walls damage.
Another factor that could damage the interior wall of a fiberglass camper is scratch. Due to the smoothness of the fiberglass campers, a balmy scratch tin be easily noticeable, and from there, major damages occur.
Fiberglass travel trailer campers have forepart or rear, which are not vacuum but are joined together or glued. Immediately water gets to any of these parts, particularly the window side. It gets the cardboard wet, and in one case it'south wet, it destroys the interior walls.
Aluminium cloth
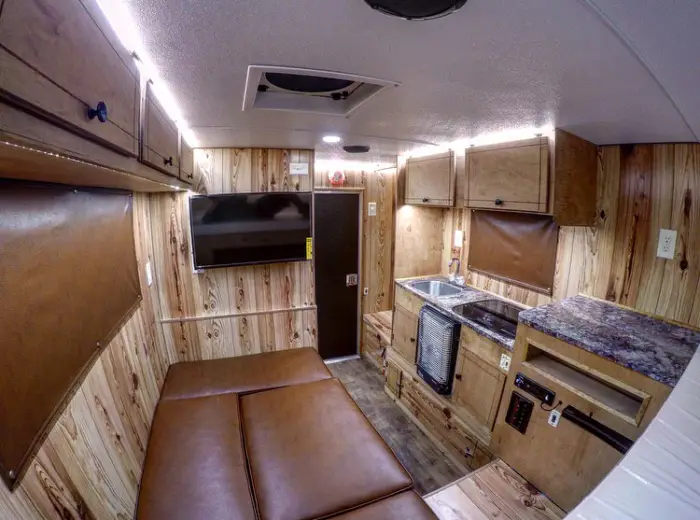
The image beneath shows a travel trailer made up of aluminum materials.
How does water affect the interior walls of campers fabricated with Aluminum materials? Read on to find out.
When the silicone on the sides or roof corners of travel campers fabricated with aluminum materials isn't properly sealed, it develops a leakage, by which water flows through to damage the interior walls.
The water that flows inside the walls might cause serious damages. Most time, it takes time to discover it; by then, it has damaged the interior wall.
You might exist wondering where the water passes. Information technology flows through the hollow that is in the camper. These hollows are peculiar with RV campers that are made up of aluminum materials.
Meanwhile, the rust causes the battery to autumn down most times and create openings in the walls that are practically not good for the campers.
Apart from travel trailer campers, having accidents, water also destroys the travel trailer interior wall.
Now that you have an idea of the causes of camper's damages and the extent of the damage, you lot can begin to figure out the solution to the problem.
The precaution to this interior wall damage is shown below:
- Not to betrayal the travel trailer campers to any of the factors that could damage it easily, and
- Repair the already damaged parts.
In this article, I will show y'all steps on how to repair the interior wall of travel trailer campers.
These steps practical to both the Fiberglass campers RV and the Aluminum campers RV.
Hither are five steps on how to repair the travel trailer interior wall.
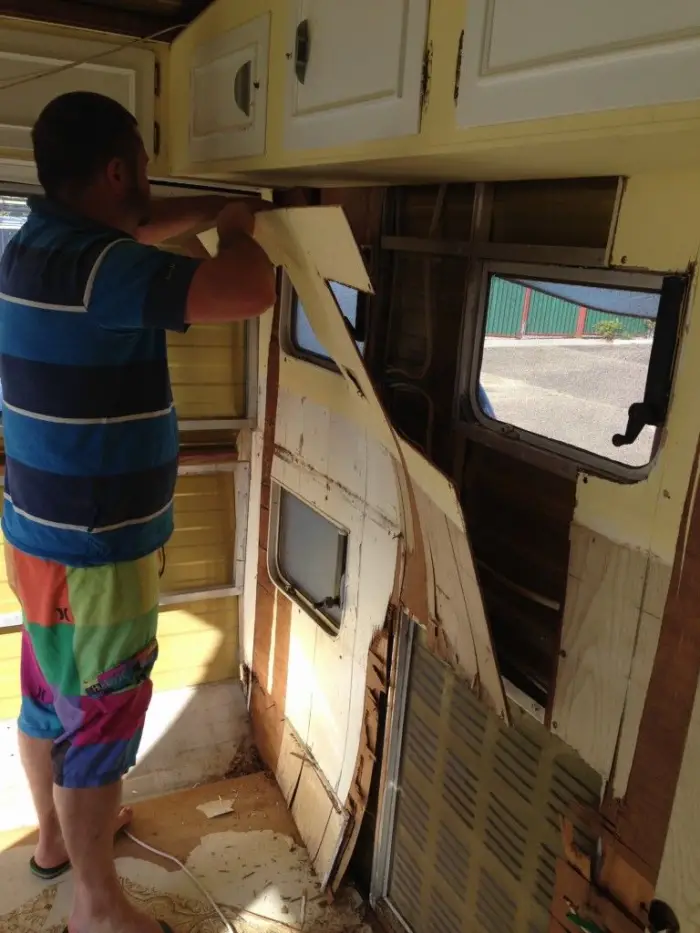
Footstep 1: Remove The Erstwhile Siding
Are you lot fix to fix the interior parts of your camper'southward recreational vehicle by yourself? Then, let's get started.
The interior of the travel trailer campers has already been framed. Therefore you don't take to carp yourself with information technology. All you lot need is to know the extent of the harm.
When y'all have found out the level of the damages, then you can budget for the cost. (Budget hither simply means the money yous volition spend to buy materials even though you volition build information technology by yourself).
This do volition salve you some expenses during repairs. Make sure you carry out a thorough cheque on the interior to know the level of damage before you start.
Since yous have studied the caste of the harm, let'south start by removing the interior comprehend. This will let you know and see the rust areas.
Get to work now.
Accept away any obstacle that may obstruct you from accessing the wall properly. Below are the things that might probable cause an obstruction when accessing the wall:
- Cabinets
- Drapery rails
- Furnishings
- Sticker-on tiles
- Wallpaper
Remove or peel away annihilation that may complicate bug during this assessment to enable you to do a clean work. Take away the liquid nails and the expansion cream from the frame.
Probably you may come beyond some electric wires and pipes buried in the section of the wall yous want to repair. So, remove everything for another re-fixing and re-wiring.
Stride 2: Maintain The Existing Wall (Frame)
Don't destroy the existing frame. Probably the outside may be good. Focus on the interior.
Exit the frame the style it is and quietly remove the board that was glued or stapled with the frame.
Re-frame some parts that might have rusted with new wood — to make it potent simply don't destroy the entire frame if there's no need for it.
Step 3: Showtime Re-Building The Interior
At this indicate, you're done with removing the console, plywood, electrical wires, plumbing pipes, and the foam with other things like stapled areas.
The next thing is to apply an RV Leak seal rust inhibitor (e.g., Rust-Oleum) afterward yous might have fully scraped the entire rusted place and put new materials.
You might use ii or three coats of it or more than depending on the size of your trailer.
Permit it to dry for 24 hours.
One time you're done, use liquid nail, a synthetic rubber multi-use adhesive that is solvent-based, which has a lasting assuming to most substrates.
Fix the insulation boards to their proper position earlier you go along. Ensure they're properly placed as they were before.
Carefully insulate the wall to avert bad work. Make the piece of work bang-up and nice. Endeavor to position them properly before you proceed to the side by side level of interior wall repairs.
Footstep iv: Employ The Expansion Foam
You're almost washed with the interior wall. And so, earlier you apply the expansion foam, make sure you're through with all your electrical wiring and plumbing.
After this, it only means you lot're ready to apply the expansion course. So go ahead to employ the expansion forms and cement everything to the wall. Make sure all the gaps are properly filled advisedly.
Trim off the excess foam. Y'all may use a little saw or any other abrupt object to spread the foam likewise.
Step 5: Get Done With The Interior Wall Repair
At this signal, you lot're at the final stage of repairing the interior of your travel trailer.
Go your plywood and console set up. Take a measurement of the side of the plywood and cut it out.
Place the plywood on a construction table and cutting the exact measure, and then that y'all can become the edges. You might employ Jigsaw to cut the panel or any other sharp object that could give you the precise measure out.
Screw-in the pall rod's holders properly and put them in the place where they are supposed to exist. Ensure the plywood and the pall rod are well placed so that yous will not have to brainstorm the exercise once again.
Brand certain you have removed the insulation block by using a flat bar. The apartment bar will enable you to practise the piece of work perfectly well.
Cheque for whatever rust, and remove all that y'all can see. Get rid of the large flakes and smooth everything out as possible.
At present you can apply liquid nails for proper closure. Put back the insulation block to the verbal place.
Don't use a hammer at this stage considering this volition make the interior not be polish. Identify the paneling properly well into its identify.
Fill the entire gap and wipe subsequently you are washed with the filling. Apply color putty and cover the area that needs to be covered.
At this point, you lot tin start to put tiles, wallpaper, furnish the interior, and plumb the unabridged kitchen, toilet, and every other part that requires such.
Now your trailer interior has taken-upwardly a new shape. It has a skillful expect and is conducive to family unit camping.
Determination
Nosotros came to the end on how to repair travel trailer campers. By now, you lot shouldn't be confused.
Accept the steps one after the other to fix the interior walls of your camper. Firstly, become to know what types of material your RV is made upward of.
Secondly, ascertain the level of interior damage. Get the necessary material ready
Become to work, follow the steps the way information technology's outlined in this article.
At any point, you are dislocated, come back to read the commodity to understand the side by side step to take.
When you empathize this article and the points pointed out here, your trailer's interior will get a new shape and a good look.
Source: https://commutter.com/how-to-repair-travel-trailer-interior-walls/
0 Response to "How To Repair Travel Trailer Interior Walls"
Post a Comment